Update 6/25: The chuck that comes on the Ryobi high pressure inflator is uncomfortable to use because of sharp edges and it requires an adapter to fit on Presta valves. My old floor pump had a nice chuck that fit both Schrader and Presta valves, and was more comfortable to use because there were no sharp edges anywhere, so I opened up the Ryobi inflator and replaced the hose and chuck with those from my old floor pump. Perfect!
Here's what it looks like with the new hose and chuck:
 |
| This is a much nicer chuck than the original. |
Now back to the original post:
About a year ago I decided it was long past time to replace my ancient DeWalt 12V drill/driver as the NiMh battery was failing, again. I did some research and decided to buy an 18V, brushless Ryobi P252 that came with two, 2Ah Li ion batteries and a charger for about the same price as a replacement NiMH battery for the DeWalt unit.
The Ryobi driver is great. It's small, light, and very powerful thanks to Li ion batteries and the brushless motor. It has a white LED that lights up the work and a magnetic tray for holding bits or screws.
Here's a review of the driver:
A few months ago I was anticipating an upholstery project and I wanted to get a stapler so I did more looking. I ended up buying a Ryobi electric stapler that uses the same 18V batteries that the drill uses. The stapler slams staples deep into hardwood like it's butter!
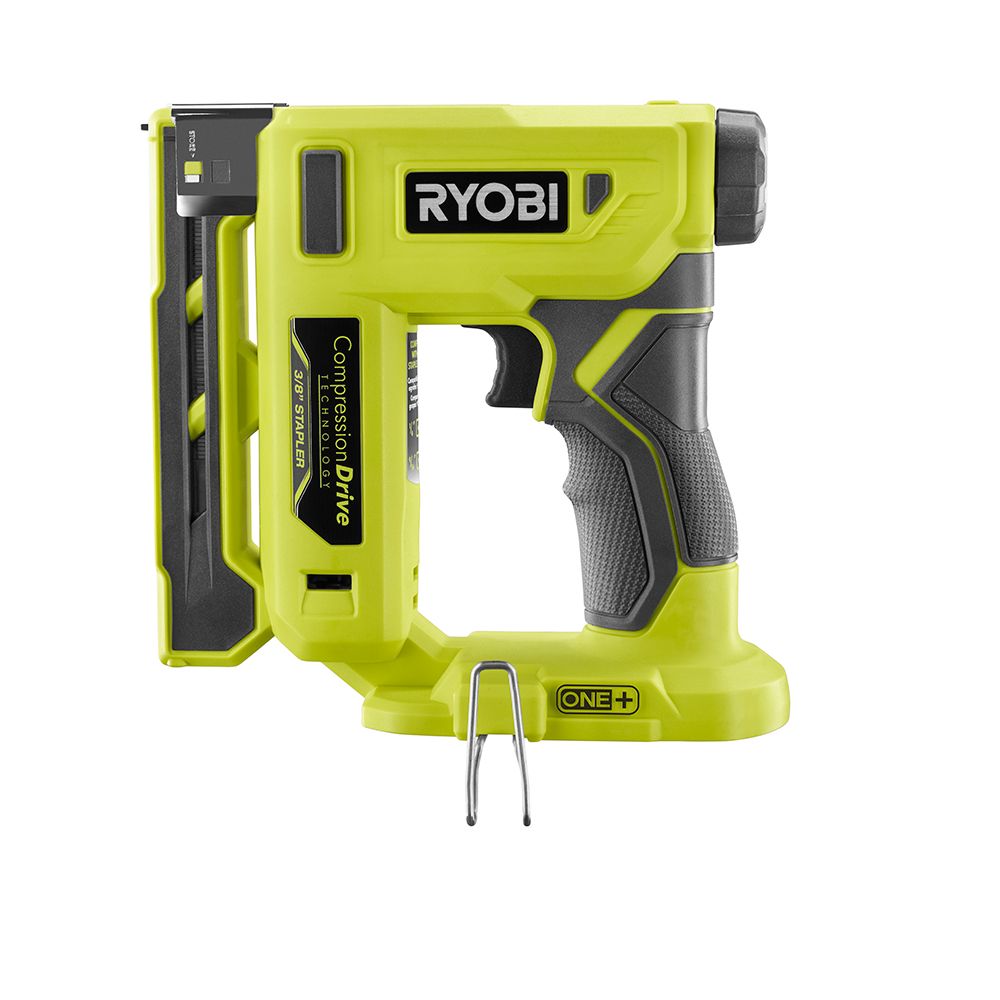 |
| The stapler is every bit as good as the drill/driver. |
Here's a review of the stapler:
I got a new bike in March and have been using an old floor pump I've had for about 15 years to keep the tires topped up. The floor pump is a stupid design that has a screw holding the metal tube into the plastic base of the pump. The screw goes into the high pressure area and had a rubber seal that was leaking. I replaced the seal with a couple thick o-rings and some plumber's grease but no good- it still leaked. I had to pump that dumb thing a lot to get a little air into the tire as the pressure was going up, and I could hear it leaking at the screw with each stroke, as if it were laughing at my effort.
I decided to look for a replacement for the floor pump. After a bit more research I found that Ryobi makes a high pressure inflator that uses the same 18V batteries as the drill and stapler. Perfect! I picked one up at Home Depot for $25- less than the cost of a decent floor pump, and cheaper than ordering it via amazon.
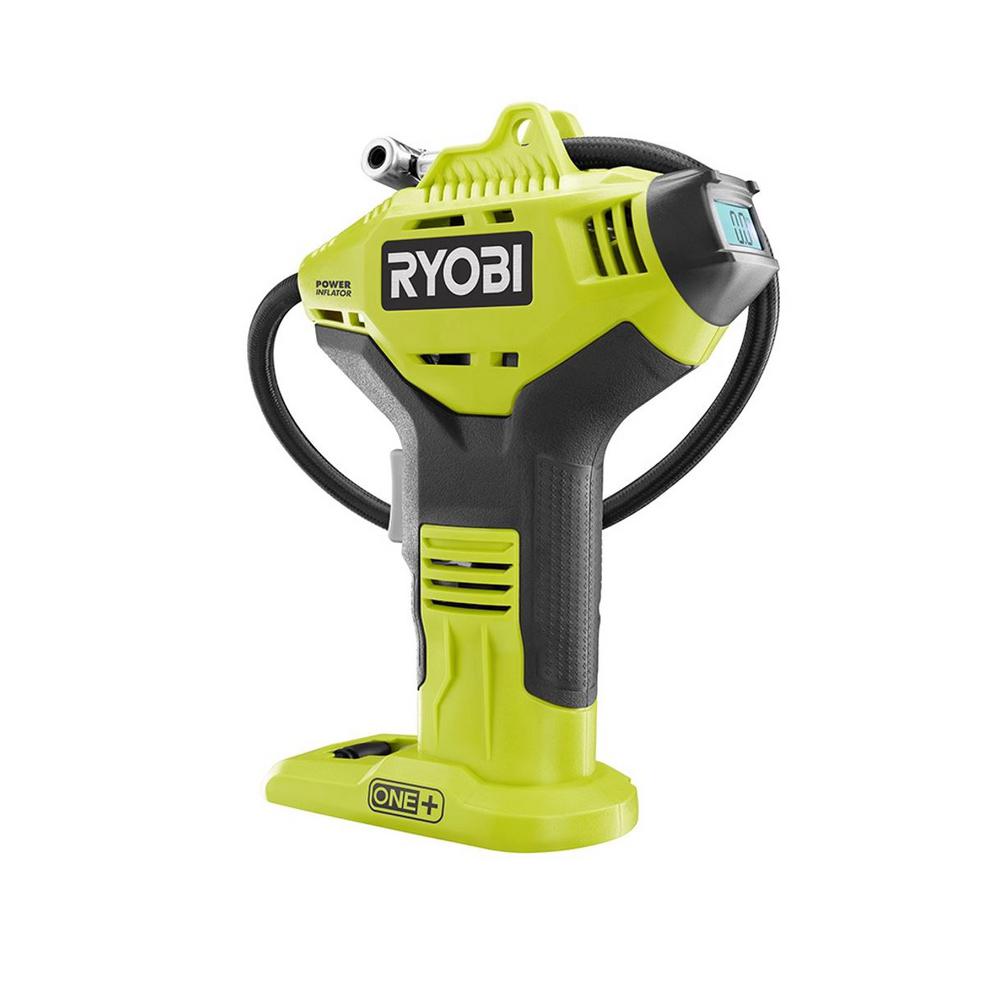 |
| The inflator can pump up to 150 psi and has a duty cycle limit of 5 minutes on/5 minutes off to prevent overheating. |
I noticed a couple things about it as soon as I opened the box and connected a battery:
1) there's no lock-out on the trigger, so a very light touch will start the thing up. Don't transport it loosely in your car with a battery attached!
2) the locking chuck on the end of the hose is kind of cheesy looking. It's a bit uncomfortable to use because it has some sort of sharp edges. It requires an adapter to use with Presta valves.
Other than that, it seems to be well made. It's not exactly quiet, but it really isn't too noisy either. Best of all, it takes my bike's 700x32C tires from 60 psi to 80 psi in about 10 seconds. It has a big, easy to read, backlit digital pressure gauge that lights up whenever I squeeze the trigger.
Here's a review of the inflator that will give you some idea of operation:
I think floor pumps are officially obsolete! I don't think I'd try to inflate a car's tires with it, but it's perfect for bikes.
Before you ask, no, I am not receiving any sort of compensation for this post- I just like these tools and thought I'd share. Also, I'm just someone who does a lot of hobby stuff and find these tools more than adequate for my needs.


