Several months ago I noticed that the white overhead lights in UMMD were flickering. It wasn't a high priority so I let it go for a while. I recently got the urge to fix it, hopefully permanently, so I ordered some 12V LED bars to replace the old 24V LED strips that were in there.
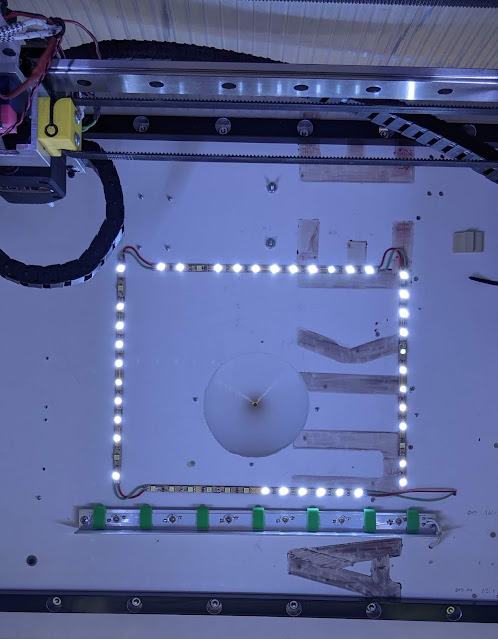 |
| The old LED strips, looking up at the "ceiling" in the printer; some dead LEDs, and some flickering. The front of the printer is at the bottom. The aluminum bracket with green clips is the top-down UV lighting. |
I found some 12V, 6000K LED bars at amazon and ordered them, pulled the old white LED strips off the ceiling, and installed the new LED bars. I used some Wago lever nuts to connect the bars together and to 12V.
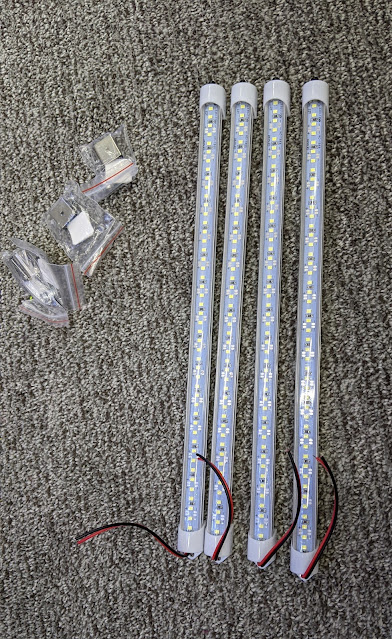 |
| The new 12V LED bars came with mounting hardware. They are good for about 3W each. |
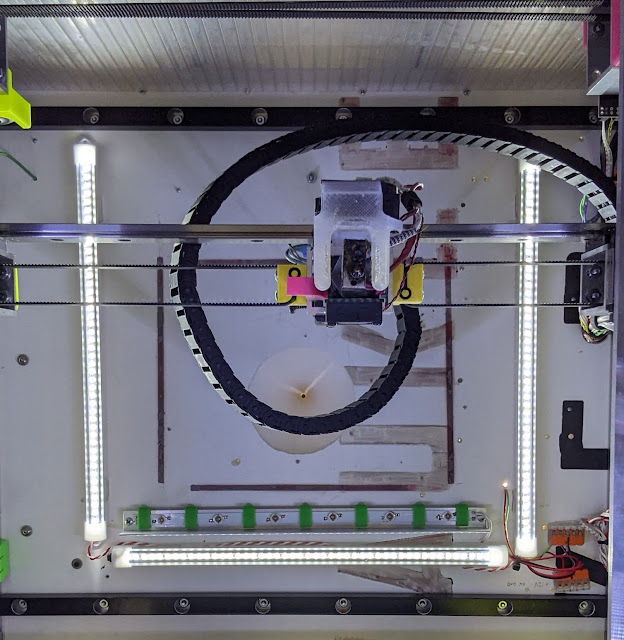 |
| The new LED bars installed in the printer. |
One thing I didn't like too much about the printer was the way I had to cut notches in the upper front cover to accommodate the XY stage belts because the motors are mounted outside the printer enclosure. I always thought it looked sort of ugly. I thought about it a little and realized I could just print some pieces to fit on the frame, then cut nice square notches in the front cover and it would probably look nicer, and might even seal a little better to keep the heat inside the enclosure.
 |
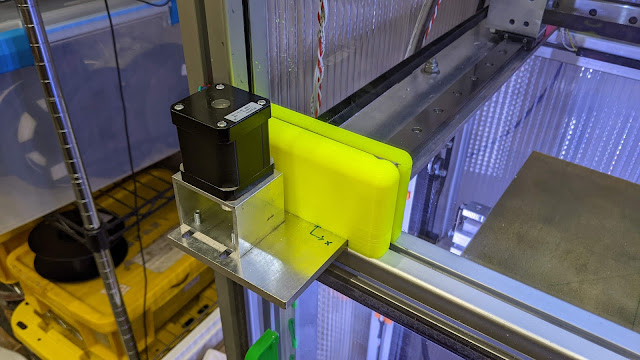
| Here's the B motor with notches cut in the front cover for the belt and the bolts that hold the XY stage together. |
I got to work in Fusion360 and came up with two parts to print that look a little neater. I thought about printing a single piece to fit across the width of the front panel, but realized that unless I printed it vertically, the bed wasn't big enough to make it as a single piece. So I split it into two pieces.
 |
The new print (yellow) at the A motor. There's a rectangular hole through the print for the belt, and a 5mm deep groove on the top and side to accommodate the front cover. There are also holes in the print to cover the two bolts that stick up. The front cover now has clean, rectangular cutouts on the two sides. The printed parts are held in place by tangs that fit into the t-slot on the left and right side and t-nuts and screws on the bottom.
|
That's it. No big deal.


No comments:
Post a Comment
Leave comments or a questions here and I'll try to post a response as soon as I can.