Thursday, August 12, 2021

An Old Project: The Snakebite Extruder

There's recent interest in the forums on different ways to drive the filament through the hot-end, especially as it seems that the teeth in some gear driven extruders result in artifacts visible in the surface of the prints. 

Here's an example of the problem:

The wood-grain looking waviness in the print surface seems to be coming from the gear teeth in the extruder.


There's an interesting thread on the subject at the Duet3D forums here.

Here's one designer's idea about a different way to drive the filament. 

Here's a recent design that looks very interesting- similar to the one above:


Both of those extruders rely on rolling threads into the filament to drive it through the hot-end. I explored that concept in a crude way several years ago.

Back in 2014, 1.75 mm filament was a new thing, and extruder jams were everyone's biggest problem in 3D printing. I thought that what was needed was a very strong push-force extruder that would be able to force filament through the hot-end and nozzle under almost any circumstances, including a partial blockage of the nozzle.

My new design came about when I found myself a little bored at a makerspace meeting and and started fooling around with a piece of filament and a 6-32 nut I found on the table where I was sitting. I noticed that the nut could be threaded onto the 3 mm filament. That got me thinking that I could use that idea in an extruder to drive the filament by spinning the nut with the motor. 

One problem with that idea was that the nut fit tightly on the filament and caused the filament to twist when the nut was turning. I needed something to prevent the filament from twisting. I decided to add a second nut, rotating in the opposite direction, figuring that if one nut twists the filament, the second one will untwist it. The second nut would have to have the opposite (left-hand) threads. Hmmm.

I did a little research and found that one can buy left-hand threaded 6-32 taps very cheaply (about $7 IRIC), so I ordered one and used it to make a left hand threaded 6-32 nut from a small piece of mild steel.

The next problem was the gears to drive the two nuts. A little shopping found sets of plastic gears for about $2 at American Science and Surplus that would do the job. I added some 5mm diameter brass tubing, and some small bearings to fit the tubing and it was almost done.

Total invested funds- about $30, most of which went to the Budaschnozzle hot-end that, believe it or not, was considered one of the more reliable designs available at the time. I can't say enough bad things about that hot-end but that's not what this post is about, so I'll just leave it alone.


The final final snakebite extruder, assembled. The green printed part is 3 pieces, all indexed to each other to ensure proper alignment when they are assembled. The red and blue gears are just press fit onto 5mm brass tubing and there are bearings at both ends of both pieces of tubing.

Did it work? Yes and no. It was fine at driving the filament, but retraction proved problematic. If the threads in the two nuts didn't match exactly and/or the hole diameters were a little different, one nut experienced more friction with the filament than the other. It wasn't enough to allow the filament to twist but it interfered with retraction. Also, the nuts had fixed diameter, and in those days, filament diameter was poorly controlled, so it would occasionally run into a blob on the filament that wouldn't fit through the nuts.

I thought about using threaded collets that would allow adjustment to fit different filament diameters, or even spring loaded collets to allow automatic adjustment, but ultimately abandoned the project when 1.75 mm filament became the standard to allow higher speed printing. 

The first prototype of the snakebite extruder. I went from this to the "final" design in about a week. The nuts are soldered to the ends of the brass tubes running through the two gears on the sides of the extruder. The mechanical force tended to push the two side gears apart, so I redesigned the top cover to help hold them together.


Here is an intermediate version assembled with the hot-end for print testing. I eventually used smaller gears to drive the nuts. With this 1:1 gearing, a full rotation of the motor drove the filament about 0.8 mm, so with 16:1 ustepping and a 200 step/rev motor, it was about 4031 usteps/mm. The result was slow but very smooth extrusion.


Here is the very first test print made using the snakebite extruder. You can see that there were some retraction problems (and ringing which is not the problem that started this post).


The top of the extruder, with smaller filament drive gears, opened so you can see the gears and bearings. The green part is actually two pieces that fit tightly together to capture the bearings.


Comparison of an early version to the final, size-reduced version.


The three printed pieces of the extruder assembled.


Side view of the final extruder showing how the gears mesh. The large green gear was press fit onto the motor shaft and was able to fit through the hole in the printed base of the extruder.


A print made using the snakebite extruder. It had excellent surface quality except for the random loop-blebs scattered over it.


A close-up of the blebs. I suspect it was part of the retraction problem.


Here are some videos I made of tests of the snakebite extruder:


Monday, August 2, 2021

More Bike Stuff

I've been riding the Priority Continuum Onyx (PCO) daily for about 4 months now (see my post here) and have made a few changes for comfort and convenience. I've also, finally, had to do some maintenance/repairs. I had a flat tire on the rear wheel, and the front brake developed a horrible squeal. 

The flat tire repair wasn't hard, but getting the shifter cables off the rear wheel proved to be a little difficult. However, once they were off, the repair went as any flat tire repairs does, and putting the wheel back on the bike and reattaching the shift cables was no problem.

The brake squeal was fixed by cleaning the brake disc and pads with disc brake cleaner followed by scuffing them with sand paper and a wipe with IPA. A total of about 15 minutes was all it took.

Other than those two minor issues, the bike has performed flawlessly. Shifting is always instantaneous and silent, the generator that powers the head and tail lights keeps humming right along. 

I list the stuff I added/removed from the bike, below:


Safety gear

I finally replaced my 20+ year old Giro helmet with what I have found to be a much more comfortable Specialized Echelon II helmet in flat black to match the bike. Back in the Giro helmet days, helmets came with a bunch of different thickness foam pads to adjust the fit. Now they have a single thin layer of foam and a knob on the back of the helmet that you turn and you can feel the helmet hugging your head as it tightens up.

Specialized Echelon II helmet. Very comfortable and the matte black finish matches the Priority Continuum Onyx bike.


I like to ride in the evening because it's usually cooler, less windy, less traffic, and I won't get sunburned. Staying alive when riding at night requires being seen. To that end I am using a set of Cygolite Hotrod lights that are small, light, rechargeable, and bright, to supplement the PCO's built in head and tail lights. I put the white light on the left side of the fork and the red light on the back of the bike's rack. Their batteries are good for more than a week of my riding between charges.

Cygolite Hot Rod lights mount on the bike using stretchy rubber straps. I put the white one on the left side of the fork and the red one on the back of the rack on my bike. The straps are secure and seem to hold up in exposure to weather. The lights are rainproof, too.


I need my hands to work, so I bought some gloves to protect them in case I fall, and they are reflective so my hands will be quite visible at night when signaling turns, etc. They aren't great cycling gloves- not much padding for my palms, and they have seams between the thumb and forefinger that make using the twist shifter uncomfortable, so when they wear out I'll replace them with proper cycling gloves.

Reflective glove lit by the flash in my phone. Normally just looks gray with a little color. The colors you see depend on the angle you view them from.


I bought a 247 Viz reflective vest to ensure that I'd be seen at night. This thing is very bright and easy to fold up and carry in my bike bag. It will fit over my coat in winter.


I added reflective tape to the wheels, helmet, and rack, and may add even more.  You can never have too many reflectors on a bike!


I added a Hafny bar-end rear view mirror so I can more easily see if someone is approaching from the rear. The mirror is made of polished stainless steel, so should be more scratch resistant than polycarbonate mirrors, and it won't break if the bike falls over or I crash (though the mount may break). The mount seems well designed and easy to install and adjust. The mirror is convex and gives a wide angle view of things approaching from behind, but the optical quality isn't as good as a glass or polycarbonate mirror. 


Bag/Backpack

While I was waiting for the PCO to arrive after I ordered it in January, I also ordered a Deploy bag from Timbuk2 that was offered at a steep, close-out discount. It is convertible from a pannier to a backpack. It has some plastic clips that lock it to the rack on the bike quickly and easily. The bag is made of some rubberized (?) nylon with a top that rolls up and keeps whatever you carry dry, even in pouring rain. I carry my ancient, heavy, thick, Thinkpad laptop to work in it every day, and it can hold quite a lot of groceries.

I also have a small bag from REI that I've had for many years that fits under the seat for emergency tools. I don't have it on the bike all the time- just when I'm going on longer rides. Someday I'll probably regret not using it all the time.


Comfort

I have a Pearl Izumi bike jacket that I have been using for many years. It's waterproof and breathable, has long sleeves that cover my arms even when stretched out on the bike, and and extended "tail" that covers my lower back in riding position. It's a great jacket, except for one thing- it has no pockets! That is a never ending source of frustration for me. I have looked at many other biking jackets and find that about half of what's out there has no pockets or just one pocket at the lower back. What are they thinking? Real people have to carry stuff when they are riding. There isn't always someone in a sag wagon driving along behind the riders to carry their crap.

I swapped the PCO seat for the Serfas Rx seat from the old Cannondale I was riding because the PCO seat just wasn't very comfortable for my pelvic geometry. The Serfas seat is split down the center and the two halves can rotate to conform to the shape of your (my) ass bones. The padding on the seat is very dense, not squishy, and is comfortable even on long rides.

I also bought a pair of Ergon GP1 grips to replace the ones that came on the PCO. I was finding that my hands were getting numb after a few miles of riding with the original grips.

I added a cheapo water bottle cage - nothing special, but it does the job.


Tools

Fortunately there isn't much to do to the bike, and I was already well equipped with metric tools that I have collected over many years of working on bikes, cars, 3D printers, and electronics. I do carry a small multi tool when I ride for just-in-case. I also carry a CO2 inflator, patch kit and tire levers. The bike has 15mm nuts on the axles and no quick release, so I should start carrying a 15mm wrench, too. Priority Bicycles supplied a decent 15mm wrench with the bike.

Sette multitool with uSD card for scale. I got this tool from Pricepoint many years ago. No, the uSD card didn't come with the tool.


A few years ago I bought a 3D printer that came with a set of hex screwdrivers. I had never heard of the brand- Bondhus- but I was impressed with them. I looked them up and it turns out you can buy them on amazon.com. I have since bought another set of the hex drivers and torx drivers because they are good and inexpensive- much better quality than anything from I ever got at Harbor Freight Tools. I have yet to break or damage any of them and they are much more comfortable to use than the L shaped drivers, though they don't fit everywhere an L shaped tool will fit.

I have to say the best, recent tool acquisition was the Ryobi One+ high pressure inflator that has replaced my crappy old floor pump. OMG it is fantastic! No more struggling with a floor pump to try to maintain tire pressure. A quick 10 second squeeze of the trigger tops off each tire and I'm ready to roll without working up a sweat before I even start to ride. If you have any of the Ryobi One+ tools/batteries, and you have a bicycle in your household, this one should be your next new tool. I paid $25 for it and feel like it was the best $25 I have spent in a long time.

When I repaired the flat tire on the rear wheel, the Ryobi inflator made quick, easy work of refilling the tire. I can't say enough good stuff about this tool!


Monday, May 17, 2021

No more floor pump for me!


Update 6/25: The chuck that comes on the Ryobi high pressure inflator is uncomfortable to use because of sharp edges and it requires an adapter to fit on Presta valves. My old floor pump had a nice chuck that fit both Schrader and Presta valves, and was more comfortable to use because there were no sharp edges anywhere, so I opened up the Ryobi inflator and replaced the hose and chuck with those from my old floor pump. Perfect!

Here's what it looks like with the new hose and chuck:


This is a much nicer chuck than the original.

Now back to the original post:


About a year ago I decided it was long past time to replace my ancient DeWalt 12V drill/driver as the NiMh battery was failing, again. I did some research and decided to buy an 18V, brushless Ryobi P252 that came with two, 2Ah Li ion batteries and a charger for about the same price as a replacement NiMH battery for the DeWalt unit.

The Ryobi driver is great. It's small, light, and very powerful thanks to Li ion batteries and the brushless motor. It has a white LED that lights up the work and a magnetic tray for holding bits or screws.

Here's a review of the driver:


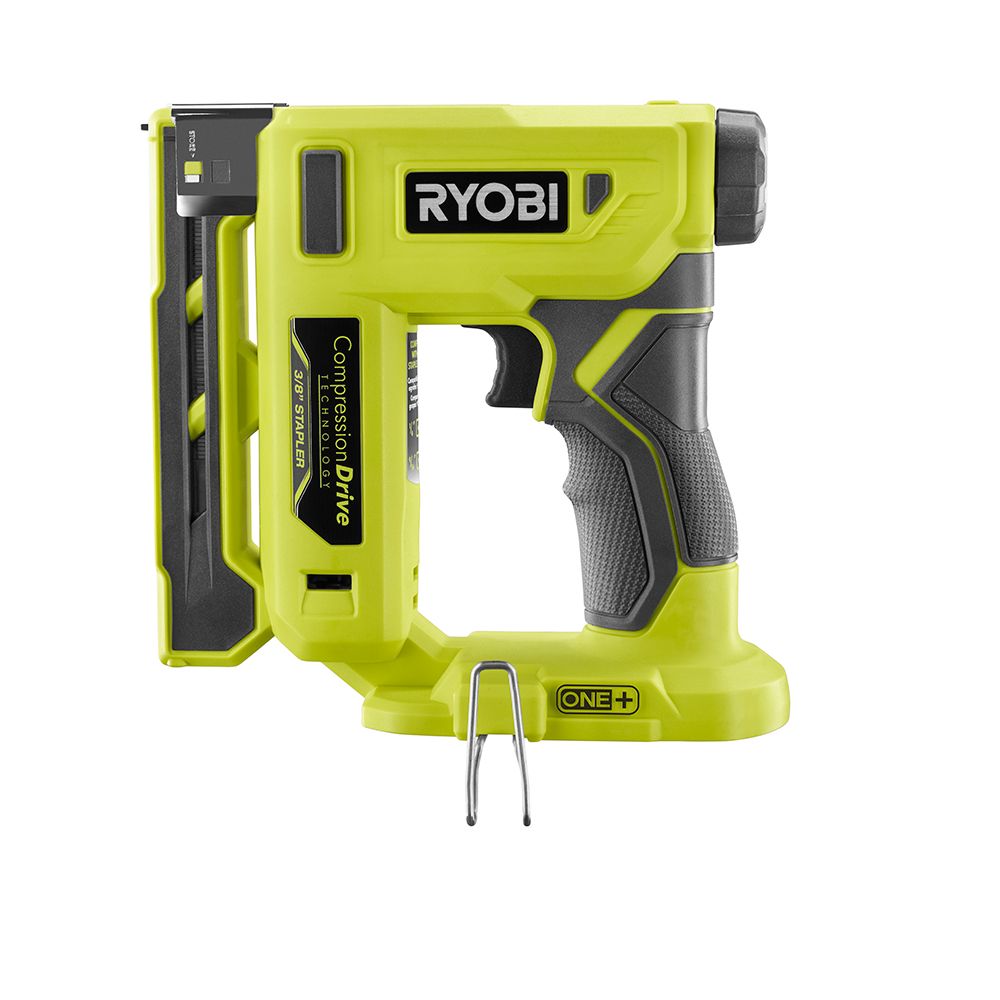
A few months ago I was anticipating an upholstery project and I wanted to get a stapler so I did more looking. I ended up buying a Ryobi electric stapler that uses the same 18V batteries that the drill uses. The stapler slams staples deep into hardwood like it's butter!

The stapler is every bit as good as the drill/driver.

Here's a review of the stapler:


I got a new bike in March and have been using an old floor pump I've had for about 15 years to keep the tires topped up. The floor pump is a stupid design that has a screw holding the metal tube into the plastic base of the pump. The screw goes into the high pressure area and had a rubber seal that was leaking. I replaced the seal with a couple thick o-rings and some plumber's grease but no good- it still leaked. I had to pump that dumb thing a lot to get a little air into the tire as the pressure was going up, and I could hear it leaking at the screw with each stroke, as if it were laughing at my effort.

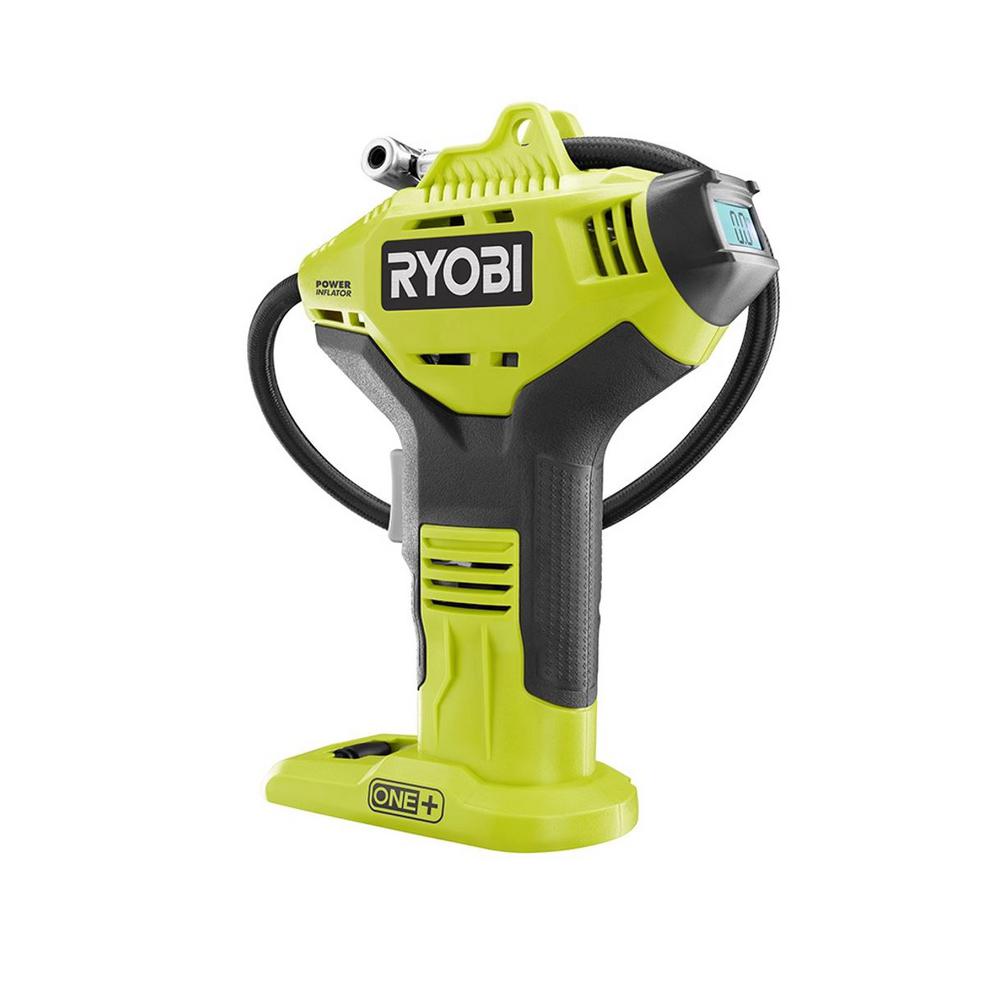
I decided to look for a replacement for the floor pump. After a bit more research I found that Ryobi makes a high pressure inflator that uses the same 18V batteries as the drill and stapler. Perfect! I picked one up at Home Depot for $25- less than the cost of a decent floor pump, and cheaper than ordering it via amazon. 

The inflator can pump up to 150 psi and has a duty cycle limit of 5 minutes on/5 minutes off to prevent overheating.


I noticed a couple things about it as soon as I opened the box and connected a battery:

1) there's no lock-out on the trigger, so a very light touch will start the thing up. Don't transport it loosely in your car with a battery attached!

2) the locking chuck on the end of the hose is kind of cheesy looking. It's a bit uncomfortable to use because it has some sort of sharp edges. It requires an adapter to use with Presta valves.

Other than that, it seems to be well made. It's not exactly quiet, but it really isn't too noisy either. Best of all, it takes my bike's 700x32C tires from 60 psi to 80 psi in about 10 seconds. It has a big, easy to read, backlit digital pressure gauge that lights up whenever I squeeze the trigger. 

Here's a review of the inflator that will give you some idea of operation:


I think floor pumps are officially obsolete! I don't think I'd try to inflate a car's tires with it, but it's perfect for bikes.

Before you ask, no, I am not receiving any sort of compensation for this post- I just like these tools and thought I'd share. Also, I'm just someone who does a lot of hobby stuff and find these tools more than adequate for my needs.

Tuesday, May 4, 2021

Another Printed Lamp

To a hammer, everything looks like a nail. To someone with a 3D printer, everything looks like an opportunity to print. I needed a new lamp, so, of course, I printed it.

I started with a single walled PETG vase that's about 250mm in diameter and 600 mm tall. I used a edge-glow glass PETG filament from Keene Village Plastics that has a little blue dye added to make it look like old Coke bottle glass. I printed with a 1 mm nozzle, 1.2 mm line width, and 0.6 mm layers. The vase took about 8 hours to print at 30 mm/sec.


The vase on the printer- almost uses the entire print capacity of the machine.

The bulb is a 300 mm long x 30 mm diameter, dimmable, "Edison" type antique-looking thing I picked up via amazon.com. It has two linear LED "filaments" that use 12W and produce 4000K light.

The bulb screws into a socket that is positioned by another printed part to put the "filament" at the vertical and axial center of the vase. 

I added a printed "shade" that fits on the bulb itself. It, too, is PETG, in this case purple. Its purpose is to protect your eyes from the bright bulb filaments while adding some color for visual interest. The shade is a cylinder with a 90 degree section cut out and facing the wall. The lamp lights up the wall behind it and the shade appears red (yes, purple filament) from every other direction. I operated the bulb at full brightness for several hours and the plastic shade is not affected by the heat from the bulb.


No, that's not a white balance problem- the brick is cream colored (old buildings in Milwaukee were made using cream colored bricks) and the shade does look red, not purple, probably an interaction between the 4000K light from the bulb and the purple shade.


Light bulb with purple shade fitted. The bulb only warms slightly in operation so it poses no danger of melting the PETG. The shade is sized to fit on the 30 mm diameter bulb and to just cover the length of the LED "filaments".


This is what it looks like in daylight with the lamp off. Note- the shade is purple. The bulb and shade are positioned at the exact axial center of the outer vase.


Another view of the lamp in daylight. The outer vase is very glossy

The vase design was made by combining two twisted designs- one right handed twist, the other left handed twist. That resulted in an easy to print, pleasing shape that produces some interesting reflections of whatever light is in the room.

Sunday, April 25, 2021

Just a dumb little thing

I lock my bike with a Kryptonite Evolution mini 7 lock and cable. The lock comes with a bracket to carry it on the bike frame. It also comes with a couple little rubber "bumpers" that are supposed to keep the lock from rattling when it's in the bracket while you ride. Naturally, I quickly lost one of the not-so-tight-fitting bumpers and the lock was rattling up a storm every time I rode. That was really annoying because the bike is almost completely silent otherwise. I did what anyone with a 3D printer would do and I "designed" a printable bumper to replace both of the ones supplied by Kryptonite.

I made my bumpers fit tighter and a little longer than the original because the original still allowed some rattling. The tighter fit will keep me from losing it, and the additional height really prevents rattling.

Here's my "design":


I took advantage of the fact that holes print small and made the inside diameter 13 mm, exactly the same as the lock, which means it will fit tightly when it goes on the lock. The outside diameter is 19 mm, and the length (height?) is 8 mm (the original was 7mm high).

I printed a couple of bumpers using TPU filament in about 5 minutes. They fit perfectly and prevent all rattling!


Anti rattle bumpers- mine and the original.

New anti rattle bumpers in place.


Sunday, April 18, 2021

New Lights for the Kitchen

 My groovy, shag-a-delic pad in town had some small pendant lamps hanging from the ceiling to light up the kitchen island. They were not particularly interesting, and they didn't really seem to work with the industrial nature of the building, mostly because they were so small. I originally planned to replace the small painted glass shades with larger printed shades, but then I found a couple big aluminum reflectors for some industrial ceiling lamps at the makerspace in very good condition. 

All I had to do was clean the dust off them in the shower and design and print some simple brackets to allow them to mount on the hanging sockets that were already in place.  I made a few quick measurements and got to work in Fusion360. This is what I came up with:


I printed a pair of them in PETG and hung up the reflectors.


Here's one of the reflectors with the bracket mounted. The reflector is 435 mm in diameter at the bottom edge, and about 300 mm high. The reflectors have little horizontal grooves, almost as if they were 3D printed.


The bracket is extra beefy and absolutely will not have a problem holding up the reflector.


The bracket attaches with 4 plastic anchor screws using the mounting points that were already provided in the reflectors.


Here it is with a warm, antique looking LED bulb that's about 200 mm long. 


Here is a conventional type LED bulb. The reflector directs most of the light downward.


This bulb is a 300mm long 5000K type that is quite bright. The reflector tends to throw a lot of the light off to the sides as well as downward. It's a little harsh because the light shines directly into your eyes no matter where you sit or stand.


The is the island lit by the two new fixtures and a couple 800 lumen, conventional LED bulbs.


Here it is with the original lamp in the center also lit.


I think the original lamps were just too small. They didn't look right with the big ventilation pipe and the large rafters.


Two of the new reflectors throw plenty of light, so it's no problem if I can't find a third reflector. I haven't decided if I am going to remove the middle pendant completely or leave it in place.


Monday, March 29, 2021

Oops! A Sand Table Disaster

Progress on the smaller sand table, Arrakis, was recently brought to a standstill. There was an incident...

The mechanism was working fine so I was working on the sand box. I got it mostly assembled and discovered that I had underestimated the protrusion of the rivets holding the box corners together and as a result, I had to take the mechanism apart and reduce it's size slightly to get the sandbox to fit properly. The disassembly, modification, and reassembly went fine, and then I powered up the machine for testing. 

The machine homed as it should, so I selected a pattern file forgetting that the dimensions of the table are now smaller than the pattern. The magnet took off and when it hit the end of motion because the table was now slightly smaller, I heard a pop, saw a spark and the whole thing shut down.

I found the Duet board had let the smoke out of a voltage regulator chip. I ordered a replacement regulator chip and installed it, but the board was still dead. Apparently more than just the regulator chip blew. I decided not to expend any more effort trying to revive the board- it was toast. I ordered a replacement.

I also checked the 200W power supply. The output on indicator LED was pulsating instead of being on continuously. Voltage out read around 12V that bounced up and down a volt or so. It was supposed to be a 24V supply.  Hmmm. I ordered a replacement.

I tested both motors and they appear to be OK, as does the smaller 150W power supply that was powering the other motor.

What happened?

DC42 at Duet3D forum has what is probably the best explanation for what happened:

"My guess is that when the servo motor hit the hard stop, it first increased the current to maximum to try to overcome the resistance. When that failed, it turned the current off, at which time all the energy stored in the motor inductance was dumped into the power supply rails, causing a voltage spike that blew both the PSU and the Duet. The stepper driver chips and the fan mosfets on the Duet are rated at 30V, although if the drivers are not energised then in theory they can take 60V. The capacitors on the VIN line are rated at either 35V or 50V. Your PSU most likely had output capacitors rated at 35V."


Now what?

I ordered replacements for the Duet controller and the power supply. Since back EMF from the motors can cause a problem if you exceed their rpm specs or suddenly block the motion (apparently), I decided to add a third, small power supply exclusively for the Duet board. That way, any mishap in the motion system won't end up killing the controller board again. I'll add some high voltage capacitance to the motor power rails, too.

I will still power the LEDs from the new 200W motor power supply as they use buck converters that are able to withstand much higher voltage input so the LEDs and buck converters aren't likely to be damaged in another "incident".


Engineering Solution

yngndrw at the Duet3D forum posted this link for a circuit designed to protect the motor driver and power supply in the event of an unexpected sudden stop. I will be adding a couple of these to protect the power supplies and motor drivers.


Essentially, this circuit shunts current from the motor to ground whenever the back EMF from the motor exceeds the power supply voltage. That will protect anything sharing the power bus with the motor.


Update 4/12/21

The mechanism is back up and running with the new controller board on its own power supply. I haven't put the protection circuits together yet, but that's coming up as I gather the parts. More to come...